
When you’ve got an outdated iMac from the early 2000s, you’ll be able to breathe new life into the {hardware} by turning it right into a Steam gaming machine.
The favored on-line gaming service Steam allows you to obtain and play common and classic video games in your Mac, Home windows, or Linux laptop.
The brainchild of Half-Life creator Gabe Newell and colleagues at Valve Software program, Steam is a digital storefront that allows you to buy and play a number of video games on an enormous vary of recent computer systems. Steam got here to recognition within the early 2000’s and is likely one of the hottest gaming companies at present.
SteamOS
SteamOS was initially designed to play Steam video games over networked computer systems operating the working system, however it was later modified to run Steam video games on standalone PCs.
With SteamOS 3, the OS was modified to run on the Steam Deck.
Proton
Valve additionally launched Proton in 2018 – a modified model of the Wine-based Home windows compatibility layer which options Win32 libraries and software program that enable older Home windows video games to run on most fashionable variations of Linux, and on Steam too. Proton is built-in into the Steam consumer as Steam Play.
ProtonDB is a user-driven web site which lists and charges third-party video games and their compatibility with Steam.
Steam Deck
A bit of over two years in the past Steam additionally launched its first handheld gaming platform, the Steam Deck, which runs Valve’s personal Arch Linux-based SteamOS, launched in 2013.
The Steam Deck relies on a customized AMD SOC and AMD Zen 2 CPU. Steam Deck runs SteamOS 3.4 and later.
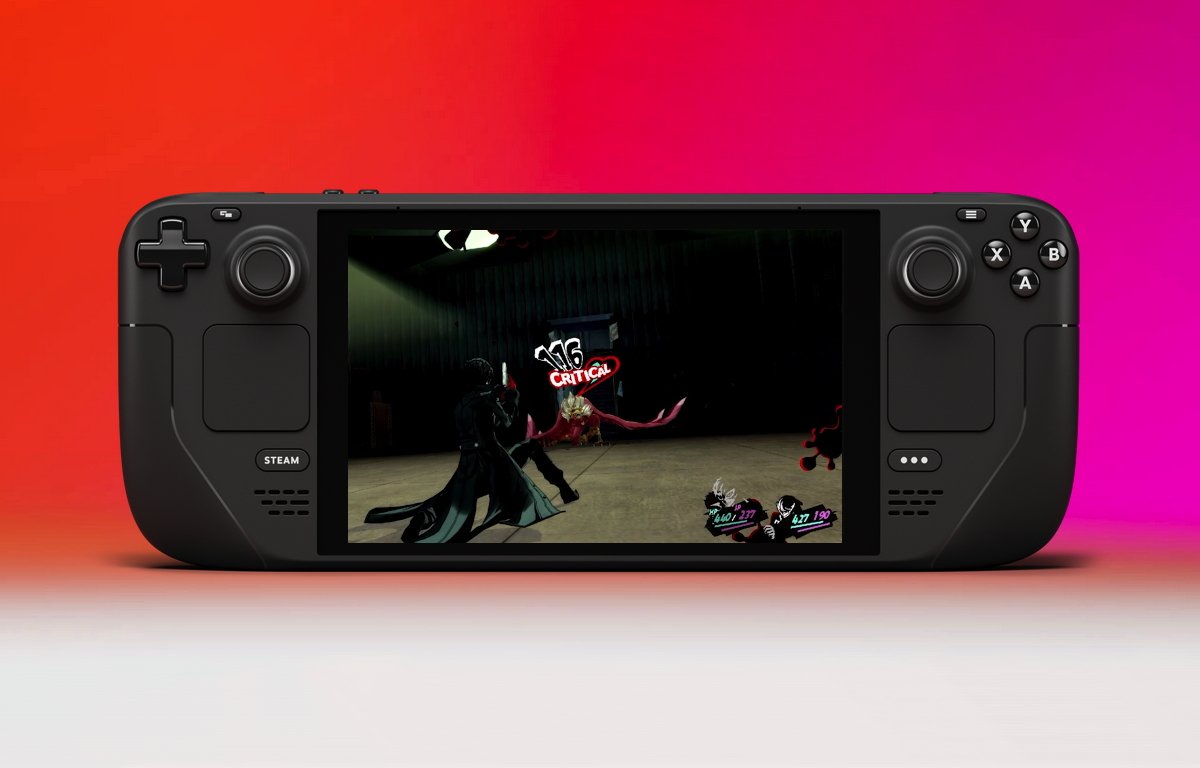
Billed as an “All-in-one moveable PC gaming” Steam Deck options an exceptionally giant show, front-panel sport controls, and permits customers to obtain and play Steam and a few Home windows and Linux video games through SteamOS and Proton.
Convert an outdated Mac to a Steam machine
Because of Linux neighborhood Common Blue, when you’ve got an outdated Intel-based Mac from the early 2000s, or a “trash can” compact Mac Professional from round 2014, you’ll be able to flip your Mac right into a SteamOS-like gaming machine utilizing a Linux distribution known as Bazzite.
Bazzite is a fork of the Fedora Linux distribution that may run natively on Steam Deck units, and on some desktop computer systems and Macs. Whereas not an official model of SteamOS, Bazzite is just like SteamOS and incorporates the Steam consumer, similar to the true factor.
Be aware that that is not SteamOS itself operating, however a Steam-focused model of Linux, which is the following smartest thing.
Common Blue has created a Bazzite set up .iso picture which you’ll be able to obtain and flash to a USB thumb drive, utilizing utilities corresponding to Balena Etcher or Fedora Media Author. As soon as flashed, you’ll be able to then run the Bazzite installer by booting your classic Mac into the USB thumb drive and operating the installer from there.
Getting began
To make use of Bazzite you will have:
- A working classic Intel Mac from 2008 or later
- A 16GB or bigger USB thumb drive
- A wired USB keyboard and mouse
- A quick web connection
- Ideally an inner SSD drive
- A Steam account
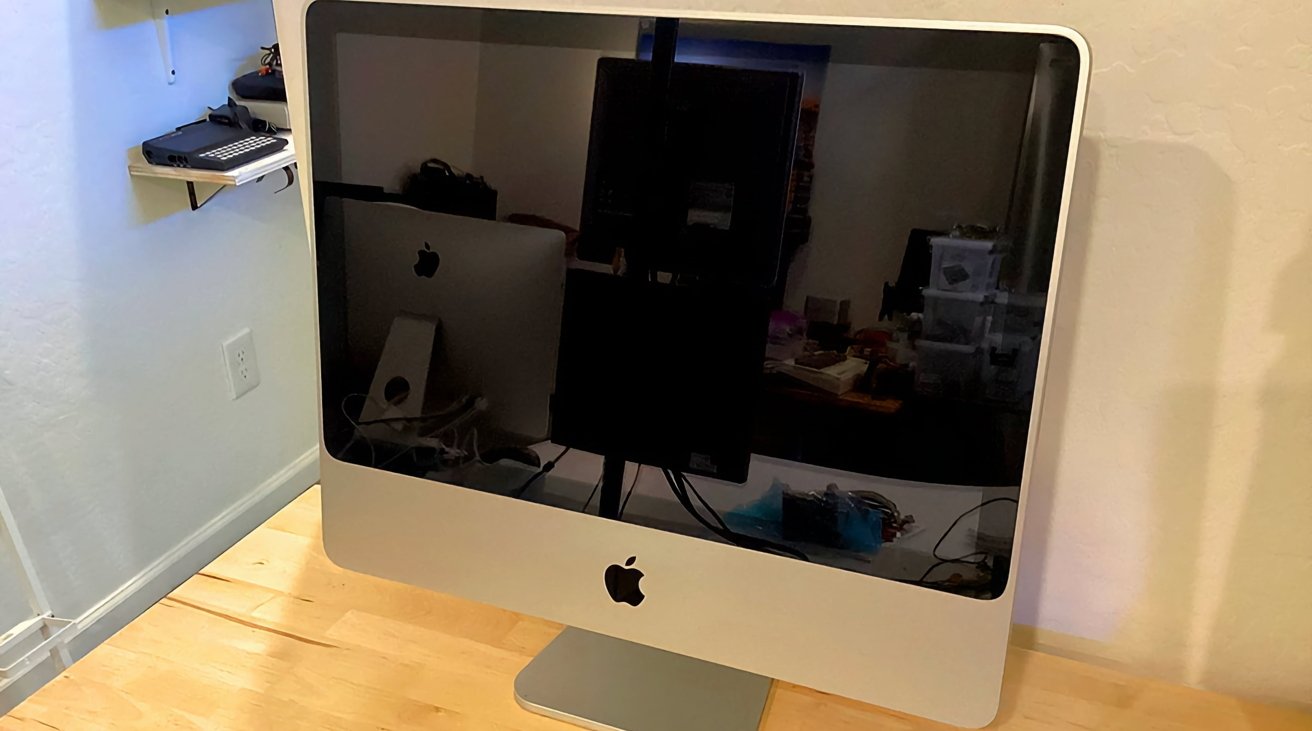
A classic Mac with an NVIDIA graphics chip is most popular, however not required. In our instance beneath we’ll use a 2008 iMac with 16GB of RAM and an inner SSD.
To get began putting in Bazzite, first plug a USB thumb drive of 16GB dimension or bigger into your major Mac (not your classic Mac). Subsequent, obtain the “bazzite-deck-38-x86_64.iso” picture from Common Blue’s Bazzite releases GitHub web page.
The Bazzite .iso picture for x86 computer systems is about 5GB in dimension.
It is all the time a good suggestion to again up all of your Mac’s knowledge earlier than trying to flash a thumb drive.
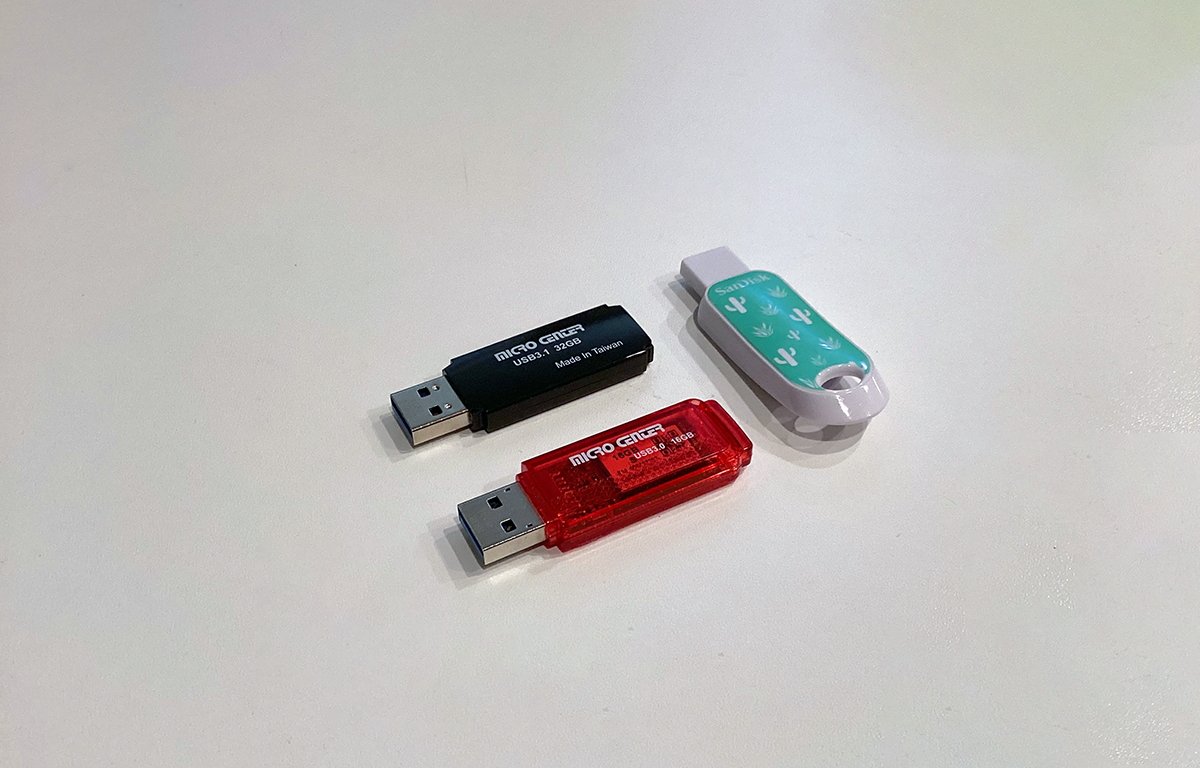
Select your weapon.
Be aware that the Bazzite distribution does not help dual-booting. The whole capability of no matter partition or drive you put in it onto will likely be consumed by the Bazzite set up.
Now run Balena Etcher or the same USB flasher app in your Mac. Choose the Bazzite .iso picture you downloaded because the enter by clicking the Flash from file button, click on Choose goal and choose your USB thumb drive because the goal.
Then, flash the .iso picture onto the thumb drive by clicking the Flash button.
Etcher will immediate you to your Mac’s admin password earlier than flashing. Enter it and click on OK.
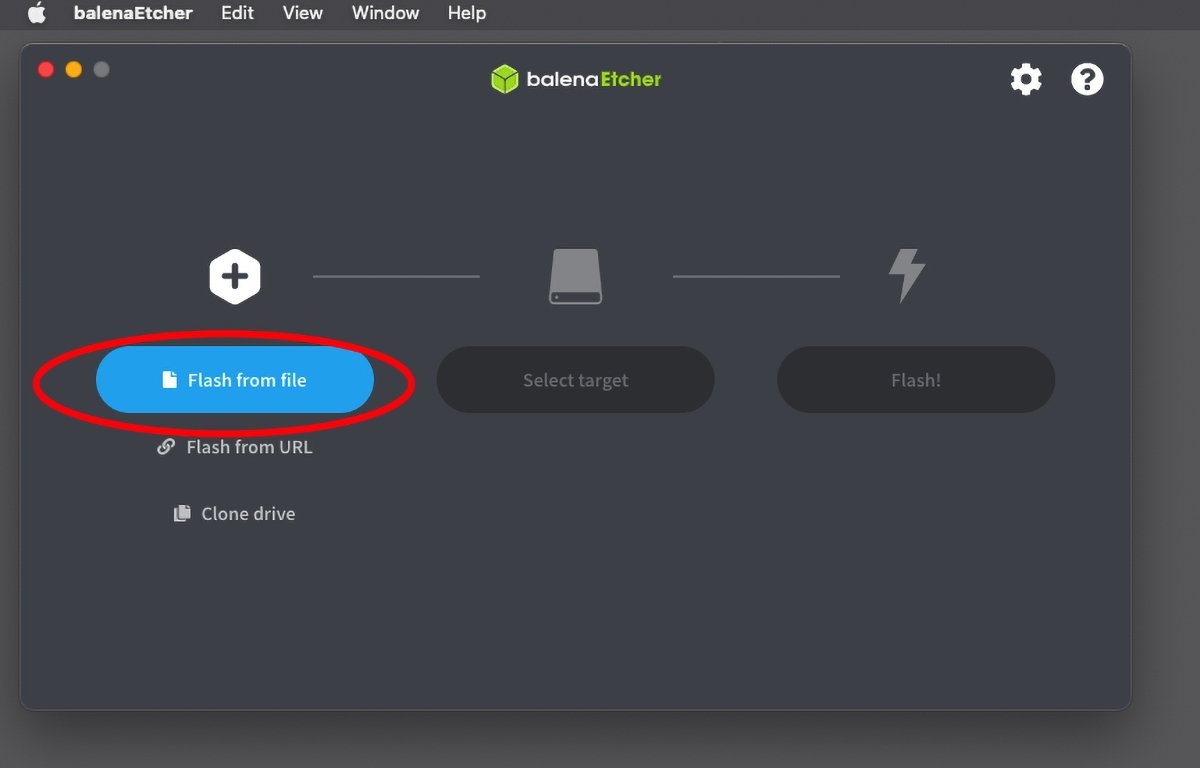
Use Balena Etcher to flash Bazzite to your USB thumb drive.
Watch out when choosing the goal USB drive, since if you happen to make a mistake, you may probably overwrite another drive, which you will not need to do. Take your time and double-check every part earlier than hitting the Choose button.
Flashing might take as much as ten minutes on a USB 2.x thumb drive, or 4 minutes on a USB 3.x thumb drive. Use a USB 3.1 or 3.2 thumb drive if doable.
You too can use an ordinary SSD drive because the flash goal for elevated pace when you’ve got a spare clean one out there.
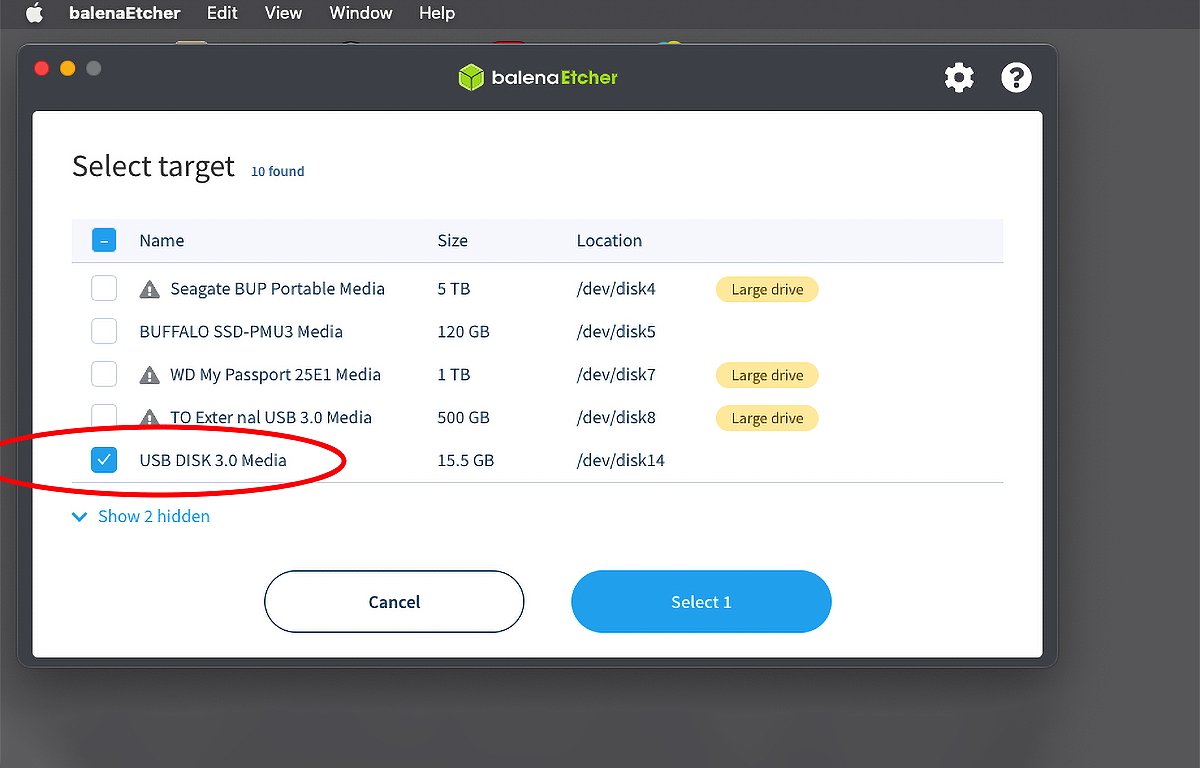
Choose the thumb drive to flash in Etcher.
Etcher will copy the Bazzite .iso onto the USB flash drive and then confirm it. If all went in line with plan, you should have a bootable Bazzite Linux installer USB thumb drive.
When flashing finishes, you might get a warning from macOS saying the disk is unreadable, however that’s to be anticipated. Simply click on the Eject button within the alert and take away the thumb drive out of your Mac.
Putting in Bazzite in your classic Mac
Plug the newly flashed thumb drive right into a USB port in your classic Mac and hit the ability button to show it on. Instantly maintain down the Possibility key in your classic Mac’s keyboard to pressure the Mac to show the boot choices display screen.
On the choices display screen, choose the USB thumb drive containing the Bazzite .iso picture (or EFI Boot if the USB drive does not seem), and click on the arrow button or hit the Return or Enter key.
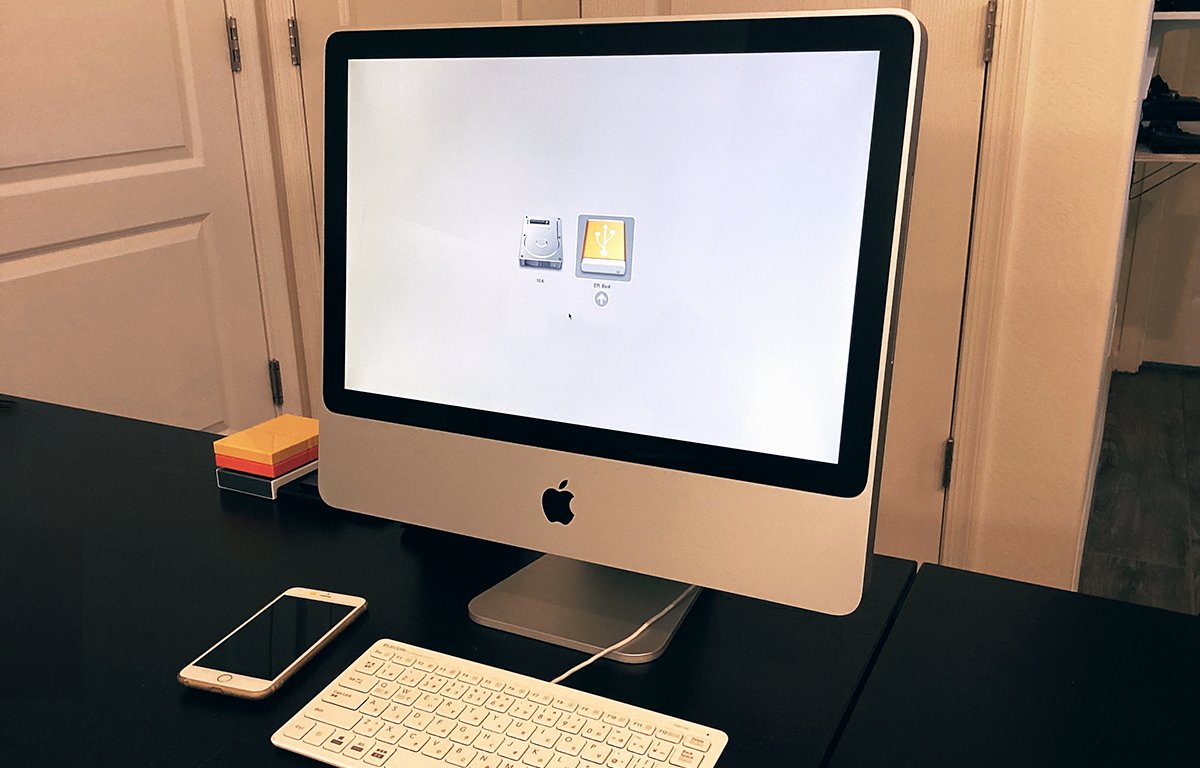
Run the boot choices display screen with the Possibility key.
Your Mac will boot into the Bazzite installer.
The Bazzite installer makes use of the GRUB bootloader as its boot menu. Use the arrow keys on the keyboard to pick the proper model of Bazzite to put in to your Mac.
You solely have a couple of seconds to select on the GRUB display screen earlier than it’ll auto-boot no matter is chosen at present.
Normally that is the primary possibility: Set up Fedora 38. Navigate to the choice you need with the arrow keys on the keyboard, and press Return after making your choice.
The Bazzite installer will keep on a black display screen for a while whereas it masses the Linux installer – often with no progress. All you may see is a cursor on a black display screen for a while.
However relaxation assured, the Linux installer is loading. After a whilst you’ll see typical Linux boot messages flood the display screen because the Linux installer masses.
Subsequent, you may see the Fedora installer display screen:
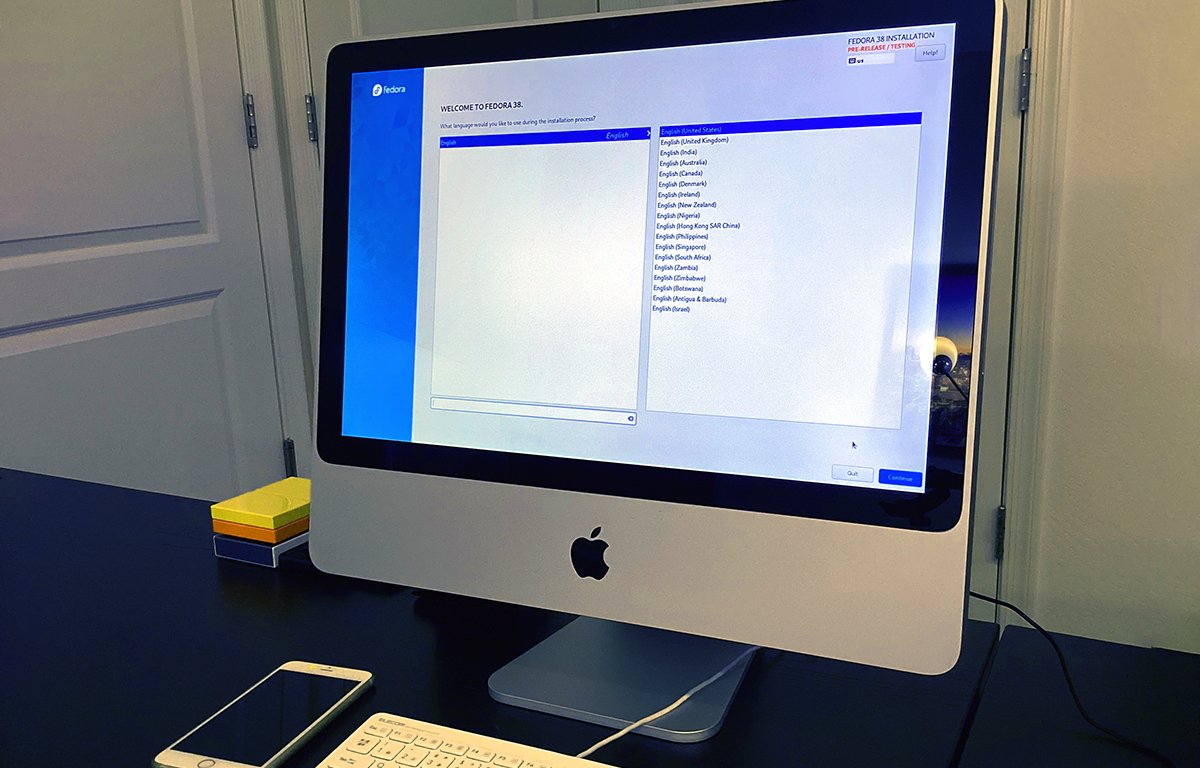
Fedora installer.
Choose your language and click on Proceed. On the following display screen you may must step by means of the Community & Host Title, Person Creation, and System panes to set set up up earlier than persevering with.
There are additionally choices to arrange your community. Chances are you’ll need to use a wired Ethernet connection as it’s often chosen by default by the installer and is quicker than WiFi.
You will additionally want a community connection to connect with Steam as soon as set up is full.
You’ll be able to add, take away, or change disk partitions to put in onto within the System pane. On this pane you’ll be able to set which partition to put in onto and whether or not or not you need to use the complete drive for the set up.
For those who do not care about what’s already in your classic Mac’s drive you are putting in onto, examine the Unlock house by eradicating or shrinking current partitions checkbox first. Have in mind enabling this checkbox might trigger all current knowledge on the goal machine to be erased.
Make all of your picks, click on Accomplished, and you might be prompted by a “Reclaim Disk House” window. On this window, you’ll be able to select what current partitions on the goal machine to take away or resize earlier than putting in.
Make your picks, click on Reclaim house to reconfigure the goal drive and exit the window.
This brings you again to the principle Fedora installer window. Now begin the set up by clicking the Start Set up button.
Ending up
Relying on the pace of the goal machine, set up can take a while, particularly on older Macs. Be affected person and look forward to the installer to complete.
When it does, click on the Reboot System button to reboot your Mac. Take away the USB installer thumb drive after rebooting.
When your Mac reboots, you may see the Fedora Linux loading display screen, which, on first boot can take a while as it’s silently configuring and setting issues up within the background. Be affected person and look forward to the boot display screen to complete.
Fedora might robotically reboot your Mac a couple of times because it configures every part. Let it do its factor and permit it to autoboot no matter model is chosen within the GRUB menu every time.
When it does lastly end, you may be requested to log in, until you chose the auto-login possibility within the installer display screen. As soon as logged in, you may see a welcome display screen with a couple of prompts.
In case your community is related, you may additionally see a small window updating the Steam consumer from the web. Permit every part to complete first.
When the Steam consumer is finished updating, do not log in to your Steam account but. Shut the Steam consumer window so you’ll be able to end stepping by means of the Bazzite welcome display screen.
We needed to manually run the Steam consumer and let it replace a second time earlier than all of the Steam updates have been full.
Bazzite welcome display screen
As soon as every part finishes updating, you may see the “Welcome to Bazzite (Steam Deck Version)” window seem. Click on the Subsequent button to proceed.
On the following display screen, you may see a Signing Bazzite change, which is on by default. Depart it on, and click on the Set up button to signal the set up.
The signing takes fairly some time – over 5 minutes on our Mac. As soon as it finishes, click on the Subsequent button.
Whereas the signing is in progress, you may also examine for any Fedora updates to replace the OS to the present model. To take action, click on the small replace button within the decrease proper nook part of the toolbar on the backside of the show.
For those who used a wired community connection, Fedora will robotically hook up with an replace server and examine for updates. If it finds any, it’ll show an replace window.
Click on the Replace All button to start updating Fedora. When updates end, shut the replace window.
Subsequent, you may be introduced with a “Organising Bazzite” display screen. Set all of the switches the best way you need them configured and click on Set up. This course of often runs pretty shortly.
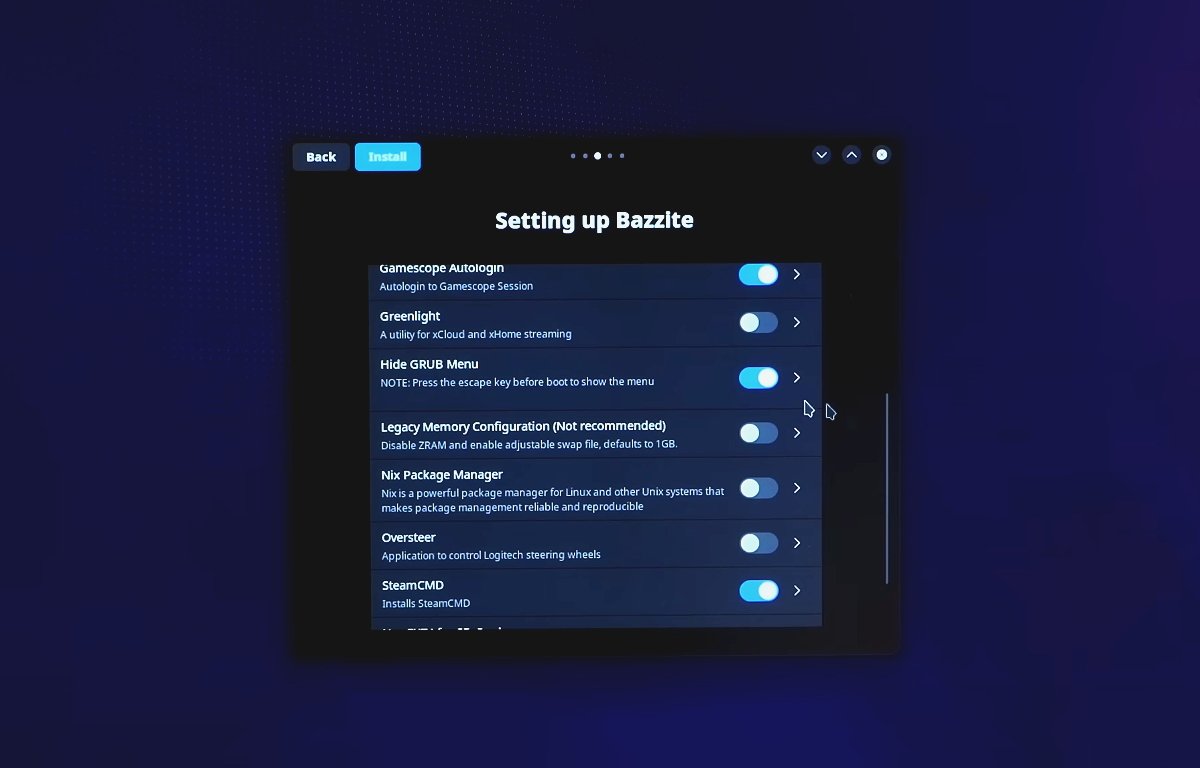
Bazzite config window.
For the closest factor to a SteamOS expertise, activate Conceal GRUB menu and Gamescope Autologin. Gamescope is a graphics and system optimizer that is additionally from Valve, and is out there on Valve’s GitHub web page.
There’s additionally one different non-obligatory third-party set up you need to use to make Bazzite extra like SteamOS: Decky Loader.
Whenever you’ve made all of your picks, click on the Subsequent button once more.
You’ll be able to select what apps you need to set up on the next pane by turning the out there switches on or off.
Most of those you’ll be able to go away off. There’s one possibility, Emulation which installs extra emulators however you might not want them if you happen to use the default emulator, EmuDeck.
Set the window switches for the apps you need put in and click on Set up (once more). This a part of the set up can also take a while.
When the applying set up completes, click on Subsequent, then Accomplished.
Desktop Steam apps
As soon as all of the signing and updates are full, you now have a completely working Steam gaming machine.
Common Blue has arrange 4 desktop hyperlinks to apps: Bazzite Portal, Lutris, Return to Gaming Mode, and the Steam consumer app.
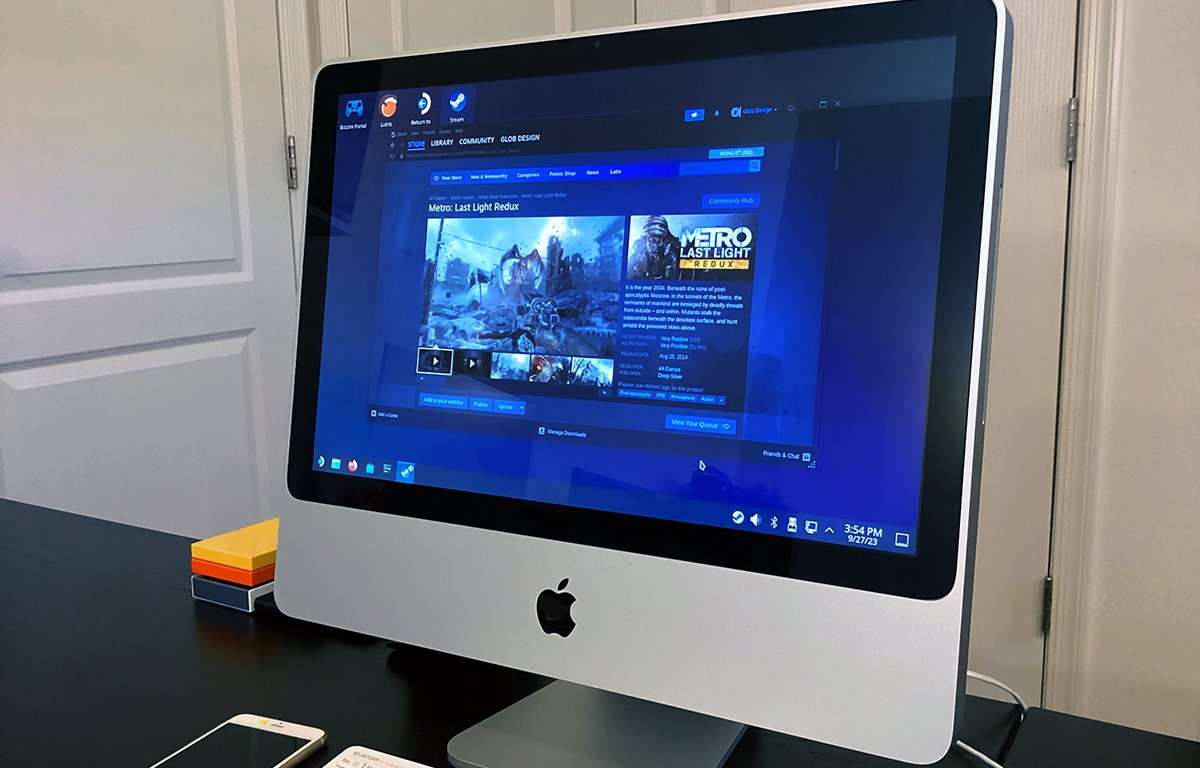
Bazzite and the Steam consumer operating on a 2008 iMac.
Bazzite Portal actually simply re-runs the welcome and setup window so you’ll be able to change any choice you made there.
Lutris is a third-party sport supervisor which consolidates video games from a number of completely different gaming companies together with Steam, GOG, EPIC Video games, Origin, and Ubisoft.
Lastly, there may be the Steam consumer app itself. Double-click it to run Steam. You will must log in to your Steam account first.
As soon as logged in, you may get the usual Steam interface.
From right here you need to use the Steam app to buy, handle, and run video games.
You too can run a number of sport consoles inside Steam by downloading and operating the multiplatform RetroArch emulator from the Steam retailer.
RetroArch has the aptitude of operating dozens of older console emulators which then will let you run video games for these platforms inside it.
Better of all, RetroArch is free and out there on most platforms. There’s additionally a stand-alone Steel-based model of RetroArch for macOS on the RetroArch web site.
Massive Image Mode
Now that every part’s arrange and Steam is up and operating, go forward and use Steam to obtain and set up your current Steam video games from throughout the Steam consumer.
As soon as that is performed you’ll be able to allow the ultimate final Steam trick to show your outdated Mac right into a full-fledged gaming console: Massive Image Mode (BPM).
In your Steam consumer app go to the View menu, and choose Massive Image Mode.
This causes the Steam consumer to reconfigure its consumer interface to make it look and behave extra like a sport console – form of like how Apple TV’s interface works.
The primary time you enter BPM in your Mac, the Steam window might not scale to full-screen completely. If this occurs, hit the Esc key in your keyboard, then go to Settings, click on the Show tab on the left, then beneath Massive Image Mode, flip off the Windowed change.
This could pressure the Steam consumer window into full-screen mode.
Click on the Again button to return to the principle Steam menu. You at the moment are in Massive Image Mode – which takes over the complete show.
Bazzite remains to be operating within the background however the UI is hidden.
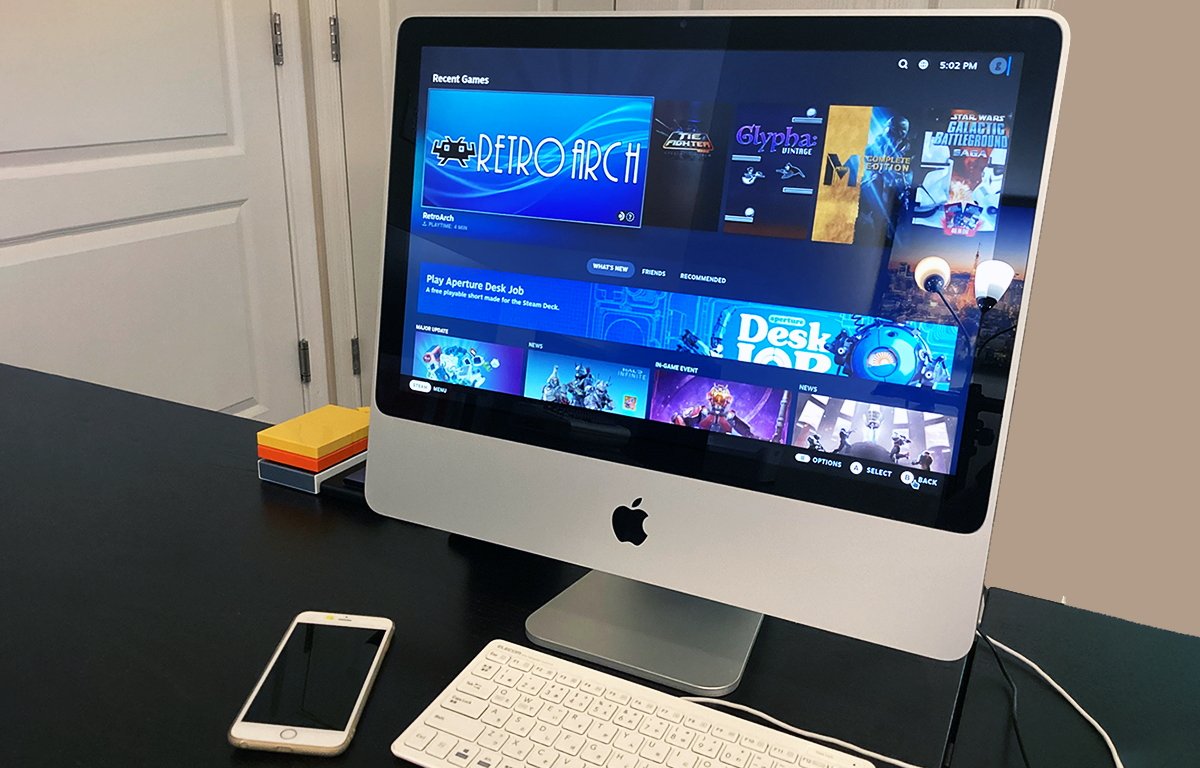
Steam Massive Image Mode.
BPM turns Steam right into a console – when you’ve got a USB sport controller or wi-fi sport controller related to your Mac, now you can navigate across the Steam interface utilizing it – similar to you’d on a sport console.
You too can navigate in BPM utilizing the keyboard’s arrow keys and Return key. For those who arrow to the very prime of Steam in BPM you get a small search bar which helps you to seek for video games.
Extra sources
On our 2008 iMac Bazzite is fairly speedy and appears to be extremely optimized for efficiency. Common Blue has performed a outstanding job making Bazzite snappy, enjoyable, and simple to put in and use.
Common Blue additionally has a tutorial setup web page and YouTube video on its web site.
Sean at Motion Retro has an entire tutorial for putting in and operating Bazzite on a 2014 trash can Mac Professional on Motion Retro’s YouTube channel. He additionally has some recommendations on tweaking Bazzite’s graphics drivers within the occasion a few of your Steam video games do not carry out nicely in your outdated Mac.
General, Bazzite is pretty spectacular. Common Blue has performed its homework. Contemplating it is a non-official Steam OS it really works surprisingly nicely and is pretty straightforward to put in and arrange.
All the things comes preinstalled besides for added apps and Linux updates.
The post-install course of may very well be a bit higher by simplifying and consolidating the method into one or two steps, however contemplating it is a one-time occasion, it isn’t that annoying.
For those who’ve obtained a spare classic Intel-based Mac mendacity round and need to flip it right into a cool Steam gaming machine, Bazzite is for you.