
2016’s iPhone 7 Plus was one thing of a milestone gadget within the iPhone’s lineage, being the primary within the sequence to undertake a secondary (2x) telephoto lens and the primary to showcase a devoted Portrait mode so as to add DSLR-like bokeh (background blur) round a topic.
Apple’s since refined Portrait mode with every subsequent technology of iPhone, bettering edge detection, including Portrait Lighting with the iPhone 8 Plus and now � with the iPhone 15 sequence � letting you flip nearly any normal picture right into a Portrait mode picture after the very fact, while additionally throwing in some highly effective new enhancing instruments for good measure.
When you’ve ever taken a photograph of a buddy or a pet utilizing the iPhone’s regular picture mode, reviewed it, and wished it had the digital bokeh dressing and depth mapping magic of Portrait mode, that is now inside attain with 2023’s iPhone 15 sequence. This is use this new photographic function to raise your would-be portrait pictures into precise Portrait mode pictures.
What you want
- An iPhone 15, iPhone 15 Plus, iPhone 15 Professional or iPhone 15 Professional Max
- A photograph with an individual, cat, or canine as the topic, taken with the ‘f‘ portrait icon seen at seize.
Easy methods to take a Portrait in Photograph mode

Whereas there is no problem being intentional about taking Portrait mode pictures on iPhone from the get-go, this new iPhone 15 function provides a further layer of flexibility to the usual capturing expertise.
- Open the digicam app in your iPhone 15
- Body up a shot in Photograph mode, with an individual, cat, or canine as your topic
- Look ahead to the � f � (for f-stop) aperture icon to look within the bottom-right nook of the viewfinder ��this implies depth knowledge is being captured.

- Take your picture by urgent the shutter button
Easy methods to edit a photograph utilizing Portrait mode controls

Whether or not you are enhancing a shot taken in Photograph mode with depth knowledge connected ��as described above � otherwise you’re working with a picture taken in Portrait mode to start with, the method of utilizing the iPhone’s Portrait-specific enhancing instruments is identical.
- Open the Images app and faucet in your newly-captured picture to open it
- You will know the picture you snapped consists of the depth knowledge wanted, as you may see a well-known � f � icon within the top-left nook of the picture; both accompanied by the phrase ‘Portrait’ or ‘Stay’ (relying on whether or not you’ve gotten Stay Images enabled as effectively).
- Subsequent, faucet ‘edit’ within the top-right of the display
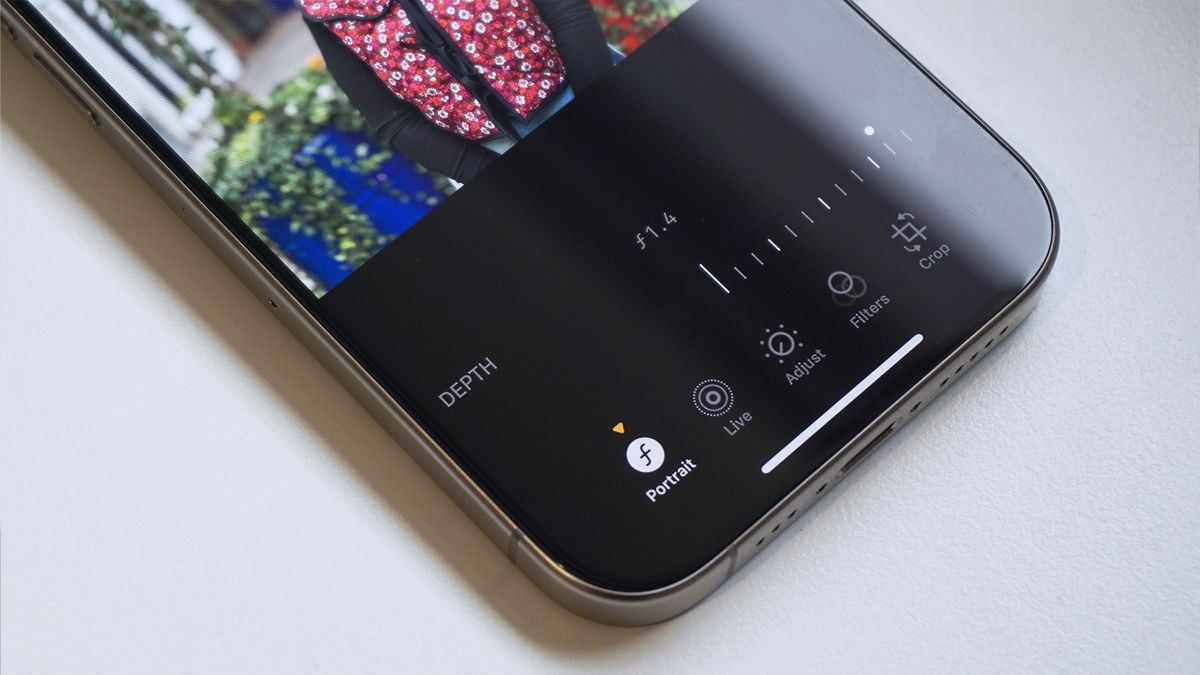
- As soon as the enhancing menu seems, you may discover a round icon with the identical � f � image as earlier than within the bottom-left of the display, beneath which you may see the phrase ‘Portrait’

- Tapping this brings up depth slider beneath your picture, which is off by default
- Dragging the depth slider from left to proper reduces the depth of area (and simulated f-stop), rising the quantity of bokeh round your topic
- It’s also possible to regulate the main focus of your newly-created Portrait mode shot by tapping on the display to alter the main focus aircraft, e.g. tapping on the background will convey it into sharp focus, whereas your authentic topic will then made blurry

Extra issues to learn about Portrait pictures taken in Photograph mode
As of proper now, depth knowledge is simply captured in Photograph mode if the iPhone routinely detects an acceptable topic, which presently falls to individuals, cats, and canines.
When you faucet in your newly captured picture from throughout the Digital camera app, as an alternative of going to the Images app as directed, the ‘edit’ button will likely be within the bottom-right, slightly than the top-right.

Depth knowledge (and thus the flexibility to edit a picture utilizing Portrait mode controls) is not connected to pictures once you ship them to different gadgets through AirDrop or iCloud by default. To incorporate all of the picture knowledge wanted for this, faucet the ‘choices’ button within the top-left of the share menu and switch the ‘All Images Knowledge’ toggle on earlier than sending.